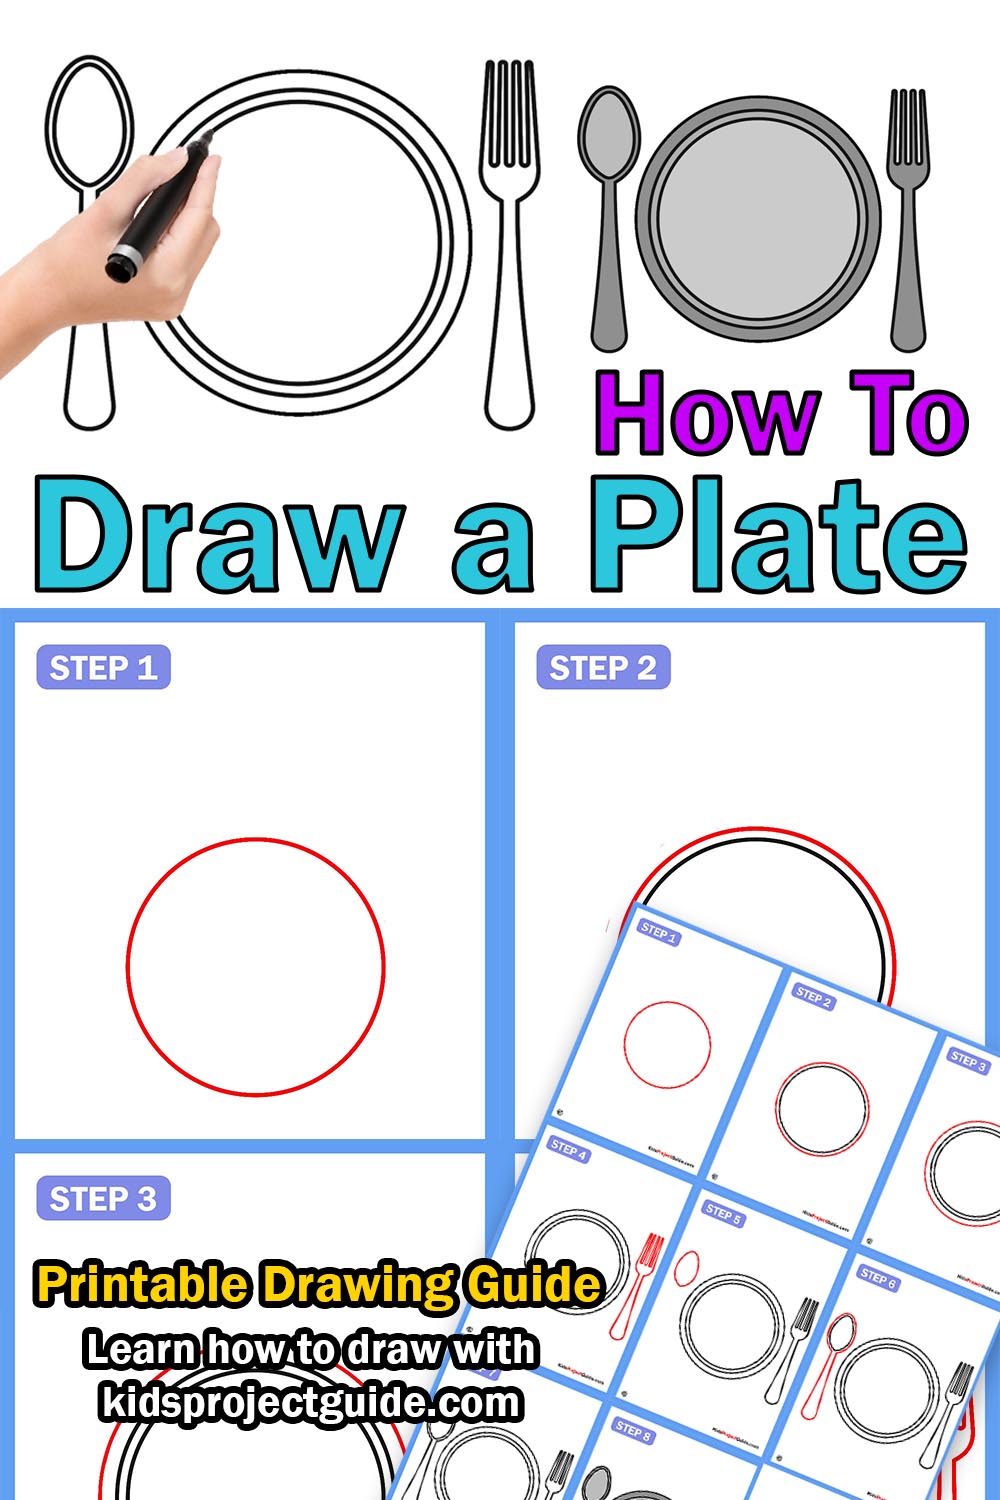
Drawing has been the easiest approach that the children learn about at first. Along with different fruits and vegetables, it is easier to draw geometric designs, like a circle, rectangles, squares and triangles.
Then, the children become familiar with common things that we tend to use every day and try to recognize their shapes by drawing them on paper.
Such a familiar topic is plates, spoons and forks which we use every day while eating. It is an easy task to draw them by following our guide.

How To Draw A Plate- Step-By-Step Instruction
Let us go through the various steps that your toddler needs to follow to draw a simple plate, spoon and fork:
Things required to draw:-
- A plain white sheet of paper
- A pencil
- An eraser
- Pastel color (if needed)
Scroll Down to Download How To Draw A Plate Coloring Page

Step 1:
The very first step is to draw a circle right at the center of the page. Do not worry if the circle is not an appropriate one.
Use an eraser to rub the crooked ends and try to make it as straight as possible.

Step 2:
Draw another circle just outside the perimeter of the previous one. Keep in mind, that the lines of both circles should not meet at all.

Step 3:
Again, draw the third circle just outside the second one leaving a gap of an inch (take the help of your mother or father to point out the distance) or if no one is near, leave a small gap like it is shown in the picture above.
The plate is finally complete. Now let us focus on the spoon and fork which is equally necessary like a plate.

Step 4:
The head of the fork which is used in scooping up food is known as a prong.
Draw the first prong on the left side by drawing two straight lines of similar length and making the ends meet at the top.
Continue the same and draw the second, third and fourth prongs. The fourth one should be similar to the first prong on the left side.
Now, extend the lines downward of the first and the fourth prong in a U-shape to create the neck of the fork and then extend more below.
The lines should go almost parallel to each other and meet at the bottom which should be a bit broad compared to the neck of the fork. This is the handle of the fork.
Your fork is ready!
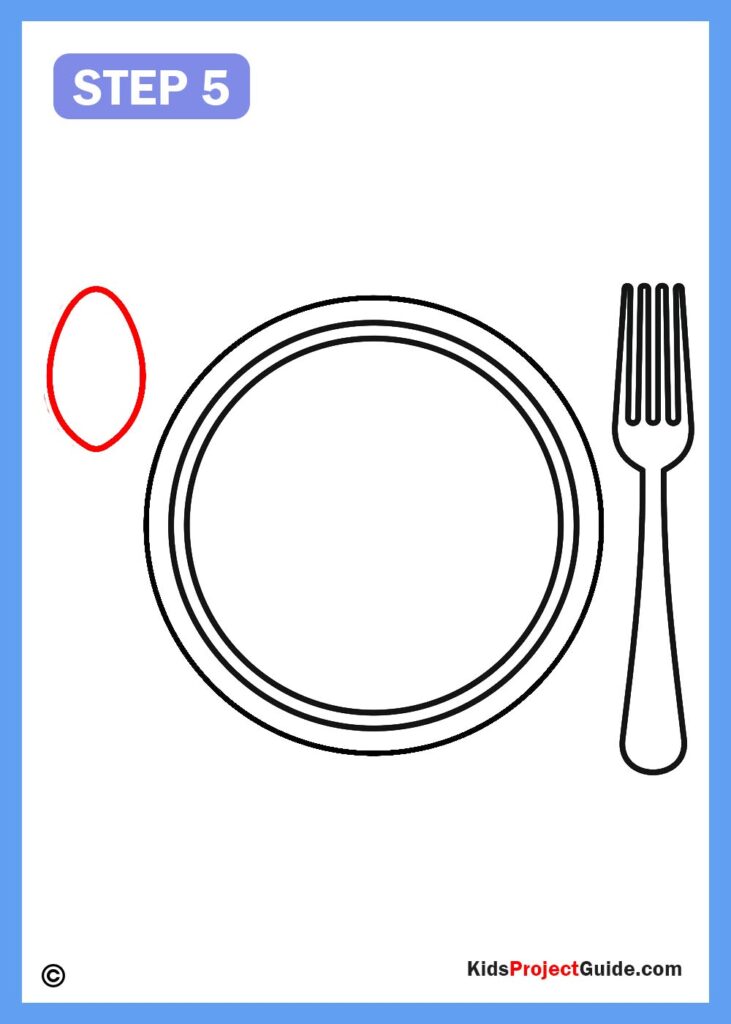
Step 5:
Now, let us draw the spoon on the left side of the plate by making an oval shape at first, just like the shape of an egg!

Step 6:
Draw another oval outside the first one without touching the lines of the first one and then extend it downwards like the fork to create the handle.

Step 7:
Let the ends meet in a broad U-shape to finish the drawing of a spoon.
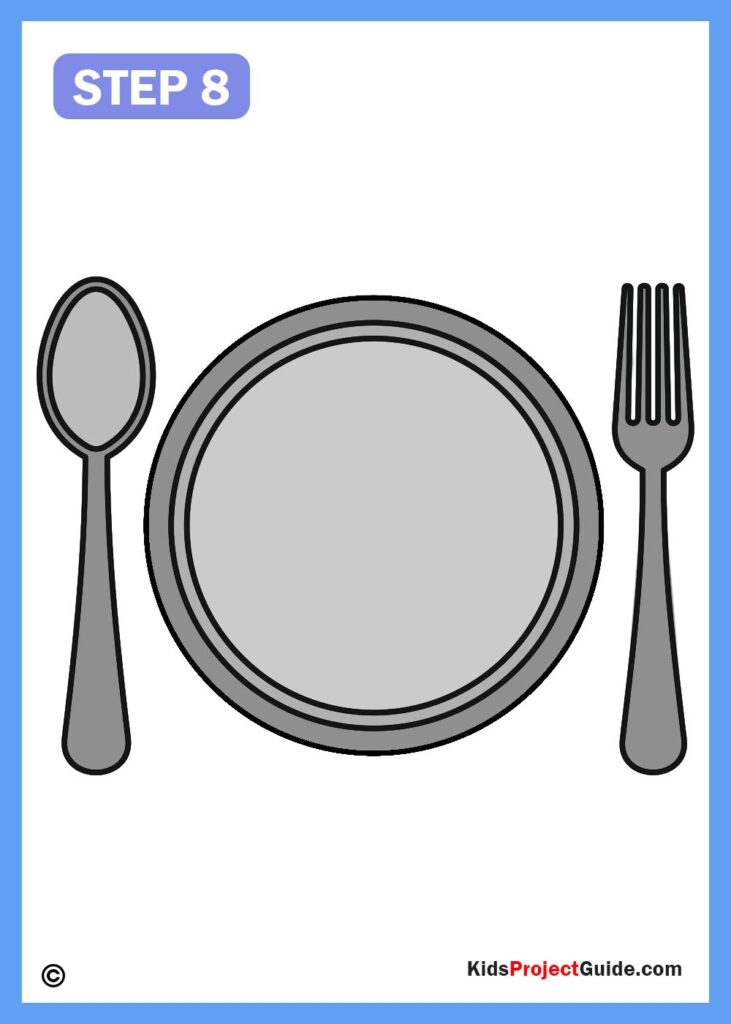
Step 8: The complete set of plate, spoon and fork is ready!
Color it if needed with any color of your choice or even you can make small prints and designs inside the plate surface. Well, We hope you have learned how to draw a plate with soon and fork with this guide.
Download The Plate Coloring Page


GIPHY App Key not set. Please check settings