In the year 1381 in England, the recipe for Apple Pie was invented. The taste of apple pie is the sweetness and juiciness of fresh apples. This is the most iconic dessert of Americans, which everyone likes to have!
An apple pie is made with different dry fruits, sweetened vegetables, and brown sugar. The presentation of an apple pie looks good, but one risk is there! The baker must be very careful with the outer part of the apple pie.
It contains too many calories, like 400 and 20 grams of fats. If you love to eat apple pie, this drawing guide will help you to draw your apple pie! In this tutorial, we have given six steps to draw an apple pie.
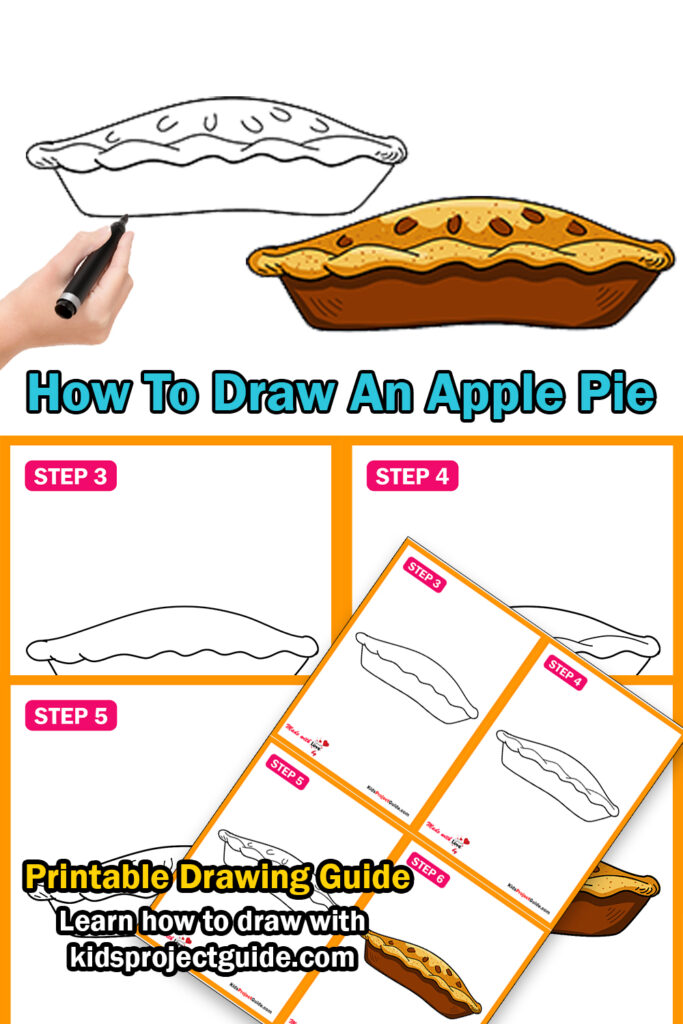
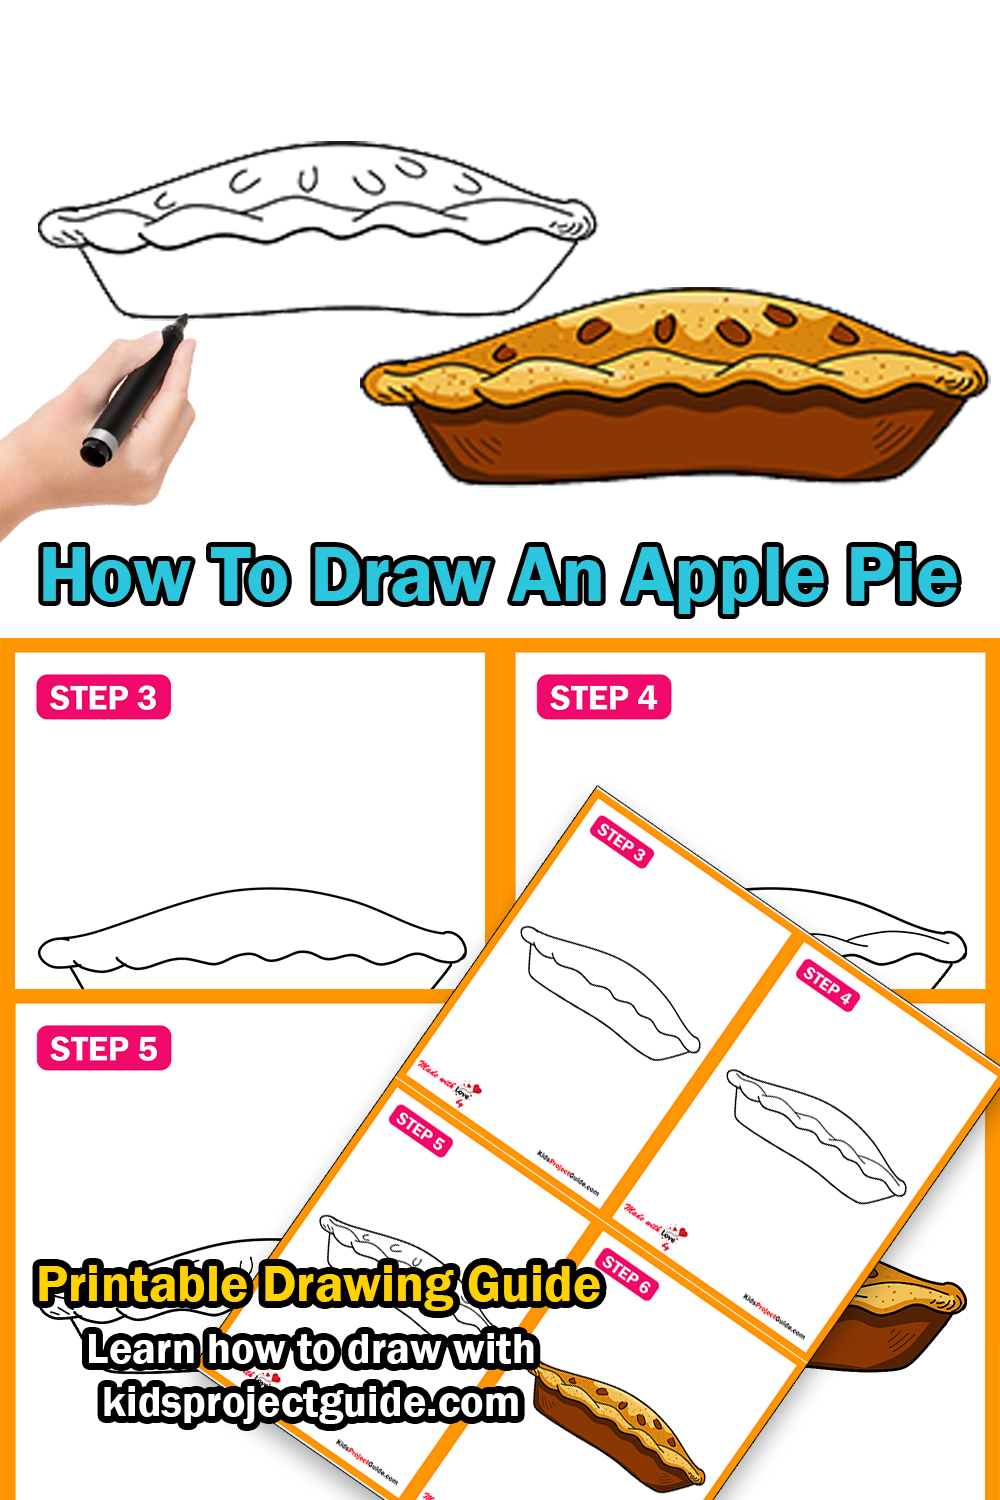
How To Draw An Apple Pie: Easy Step By Step Instructions
To draw a delicious apple pie, you need to arrange some essentials which will be needed for the drawing.
- A pencil
- An eraser
- A sharpener (If needed)
- Ruler, compass (If needed)
- Long white paper (If needed)
- Black ink pen (If needed)
- Pastel colors (If needed)
Watch “How To Draw An Apple Pie” Video Tutorial
Scroll Down to Download How To Draw An Apple Pie Coloring Page
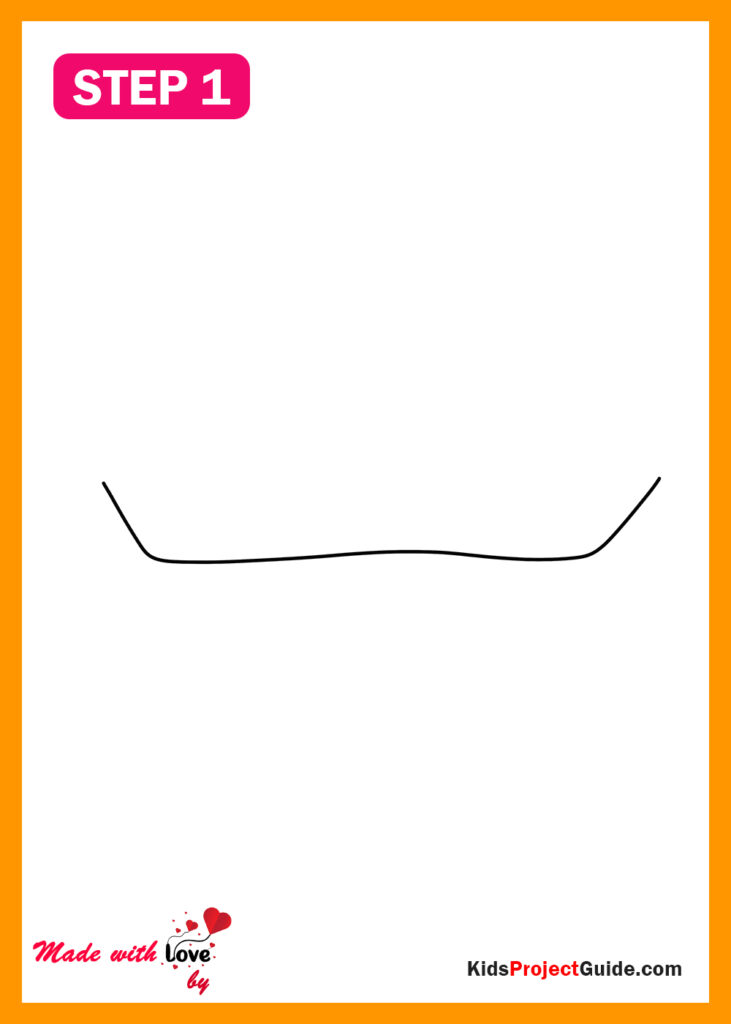
Step 1:
In the initial step, you need to start the drawing with the outline, and it will be easier for you to draw the entire pie.
In the first step, you will draw a wavy horizontal line. After that, extend a vertical line from the two ends of the wavy horizontal line and make the two rounded corners!

Step 2:
After finishing the first step, you have to proceed to the next step, and in this step, you need to draw the outer part of an apple pie. The outer part will be curvy like the above image.
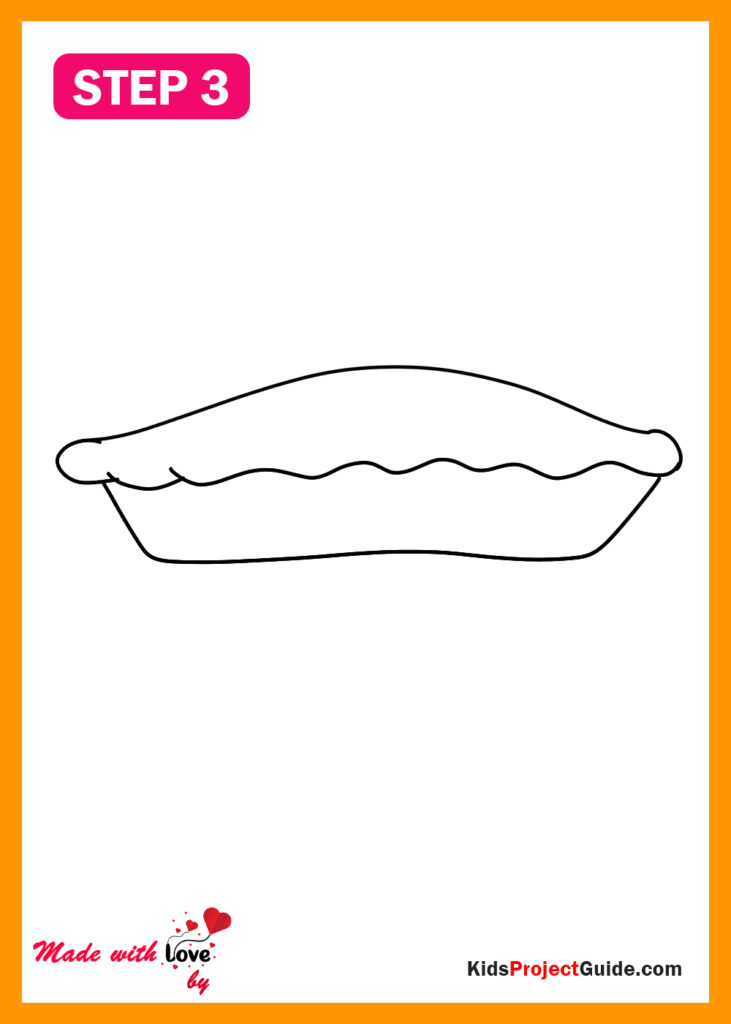
Step 3:
The drawing is not so hard, but if you want to furnish it, you can add some tutti-frutti above the upper crust.
The upper part will be bloomed because the pie is baked! You can draw the upper part more fluffy!

Step 4:
As the apple pie needs to be baked, the sides of the pie are hard and curved! In this fourth step, we have drawn the border of the apple pie, which is rounded and curved at the same time.

Step 5:
After baking the pie, it needs to look tasty and flavorful, so you can add dry fruits and dust brown sugar to it!
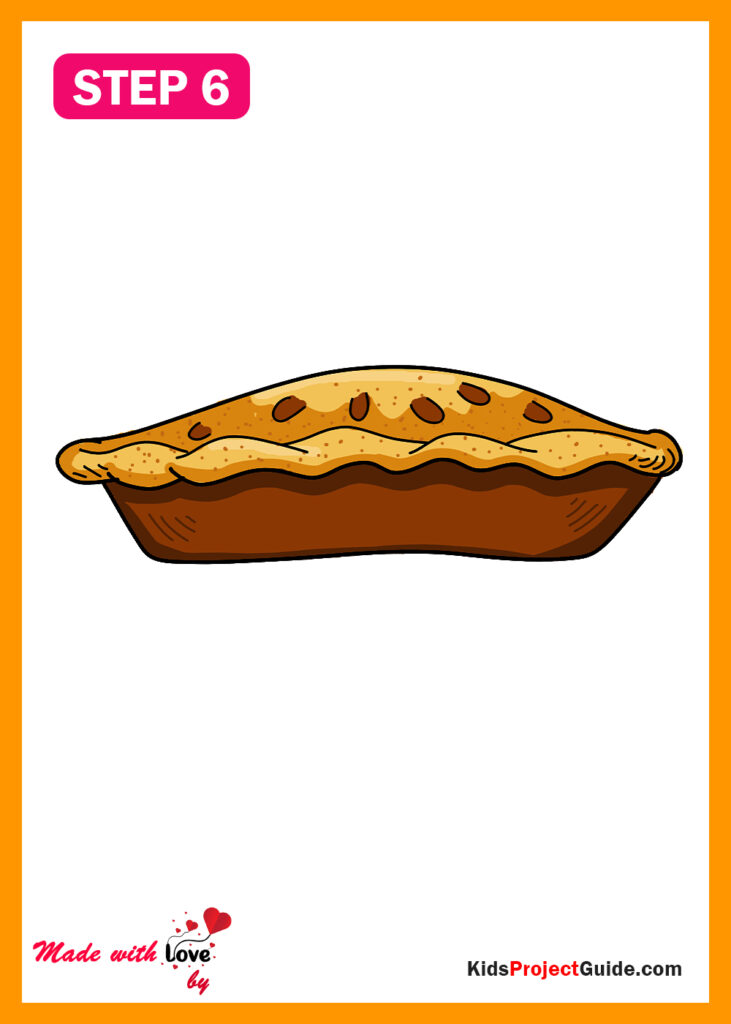
Step 6:
After completing the outline, it’s time to apply colors to it! As it is baked, the color will be dark brown. The bottom part of the pie is dark brown, and the upper part of it is light brown.
Then you can add some designs of dry fruits or dusted brown sugars!
Your Apple Pie is ready to eat!
An Apple Pie Coloring Page


GIPHY App Key not set. Please check settings