
The Hammer tool is designed to hit and dispatch replicated blows. Hand hammers have a handle and a noticeable head. The Hammer’s head is built with metals and a spike for holding woods or any necessary items.
A hammer has different parts, and all of them have different names. Generally, people can recognize hammers by the Hammer’s head and the handle’s length. They always have a handle which helps people to hold.
The handle of the Hammer is beneficial for hold. There are three types of hammers: claw Hammer, club hammer and ball peen hammer. The claw hammers are used for house building or repairing and woodworking purposes.
In this template, we have drawn a claw hammer. So, if you want to know How To Draw A Hammer, follow the guidelines below!
Also Check: How To Draw A Thor Hammer | Easy Step-By-Step Guide
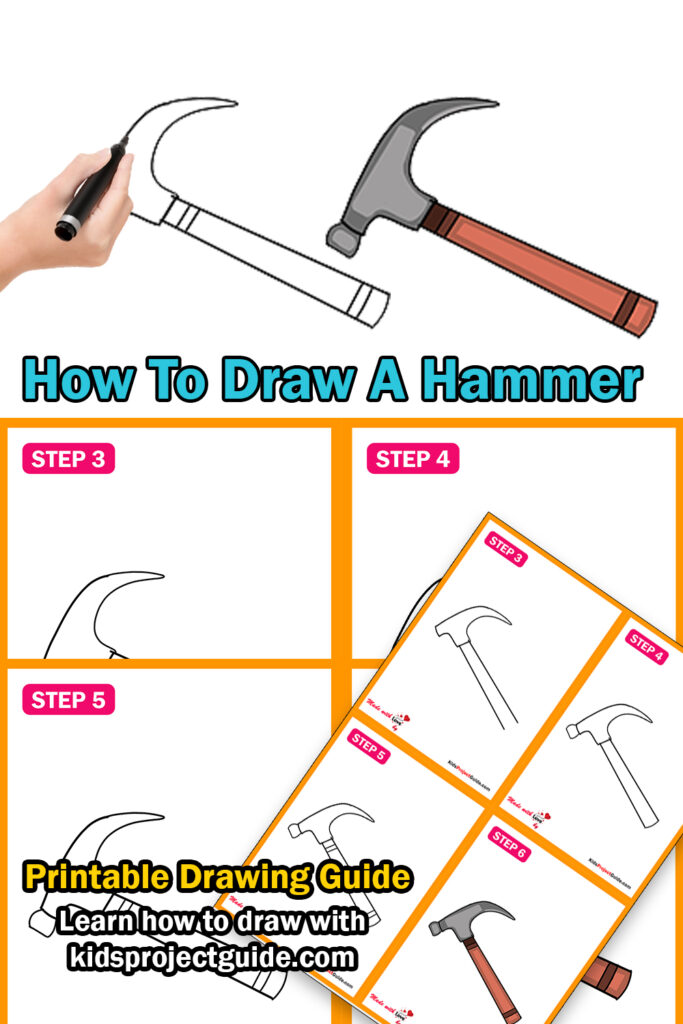
How To Draw A Hammer: Easy Step By Step Instructions
To draw this beautiful Hammer, you need to arrange some essential things for this drawing. The essentials are as follows.
- A sharpened pencil
- An eraser
- A sharpener (if needed)
- A black marker pen (if needed)
- White long sheet (if needed)
- Pastel colors (if needed)
Watch “How To Draw A Hammer ” Video Tutorial
Scroll Down to Download How To Draw Hammer Coloring Page

Step 1:
Drawing a hammer is easy; this template will guide you through drawing it perfectly!
In the initial step, you must draw two diagonal lines on the lower-right side of the white paper. The lines need not be so long!
Hammers are daily functional elements which we generally use to repair our rooms or houses!

Step 2:
After finishing the initial step, you can automatically proceed to the second step!
In this step, you can start outlining the head of the Hammer. The head style of the Hammer needed to be the same as the above image. You need not complete the whole outline of the Hammer’s head!

Step 3:
In the third step, we have almost completed Hammer’s head outline. The front side of the Hammer will be narrowed down and pointed.

Step 4:
In the fourth step, we have added a tiny square at the back of the Hammer’s head.
You can draw a normal box also.
This drawing is very straightforward and hassle-free. So, like the above image, you can feel free to draw if it is not perfect.
On the other hand, the bottom part of the Hammer needs to be joined in this step.
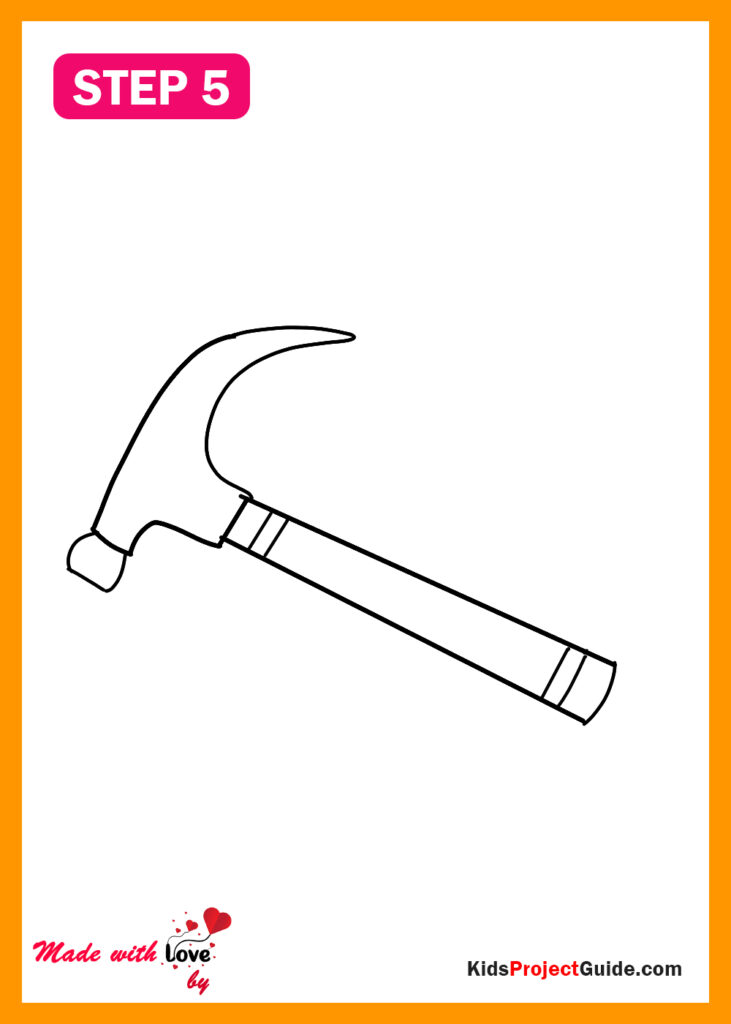
Step 5:
You can also add some strokes on the top and bottom of the Hammer’s handle!

Step 6:
We have reached the final step where we have applied colours to the Hammer!
So, we have added brown colour on the handle and a grey colour on the head of the Hammer.
If you want a stylish look, you can apply other colours too!
Your Hammer is ready to use!
A Hammer Coloring Page


GIPHY App Key not set. Please check settings